
Build your first experiment
6 min read
This guide builds one complete A/B test. The example is a coffee subscription site testing a new homepage headline: does “Free delivery on every subscription” get more people to select Start your subscription than the current “Fresh coffee, delivered every week”?
You need a project with the snippet installed.
1. Create the experiment
Section titled “1. Create the experiment”-
In your project, open Experiments and select New experiment.
-
Give it a name people will recognise in a list, such as Homepage headline.
-
Leave Type on A/B test: one page, two or more versions, split by traffic weight.
-
Write a Description and a Hypothesis. Both are optional, but a hypothesis written before the results come in — we believe that… will result in… because… — is what keeps a team honest about what the test was for.
-
Leave Traffic included at 100% unless you want only a share of visitors to take part.
-
Select Create experiment.
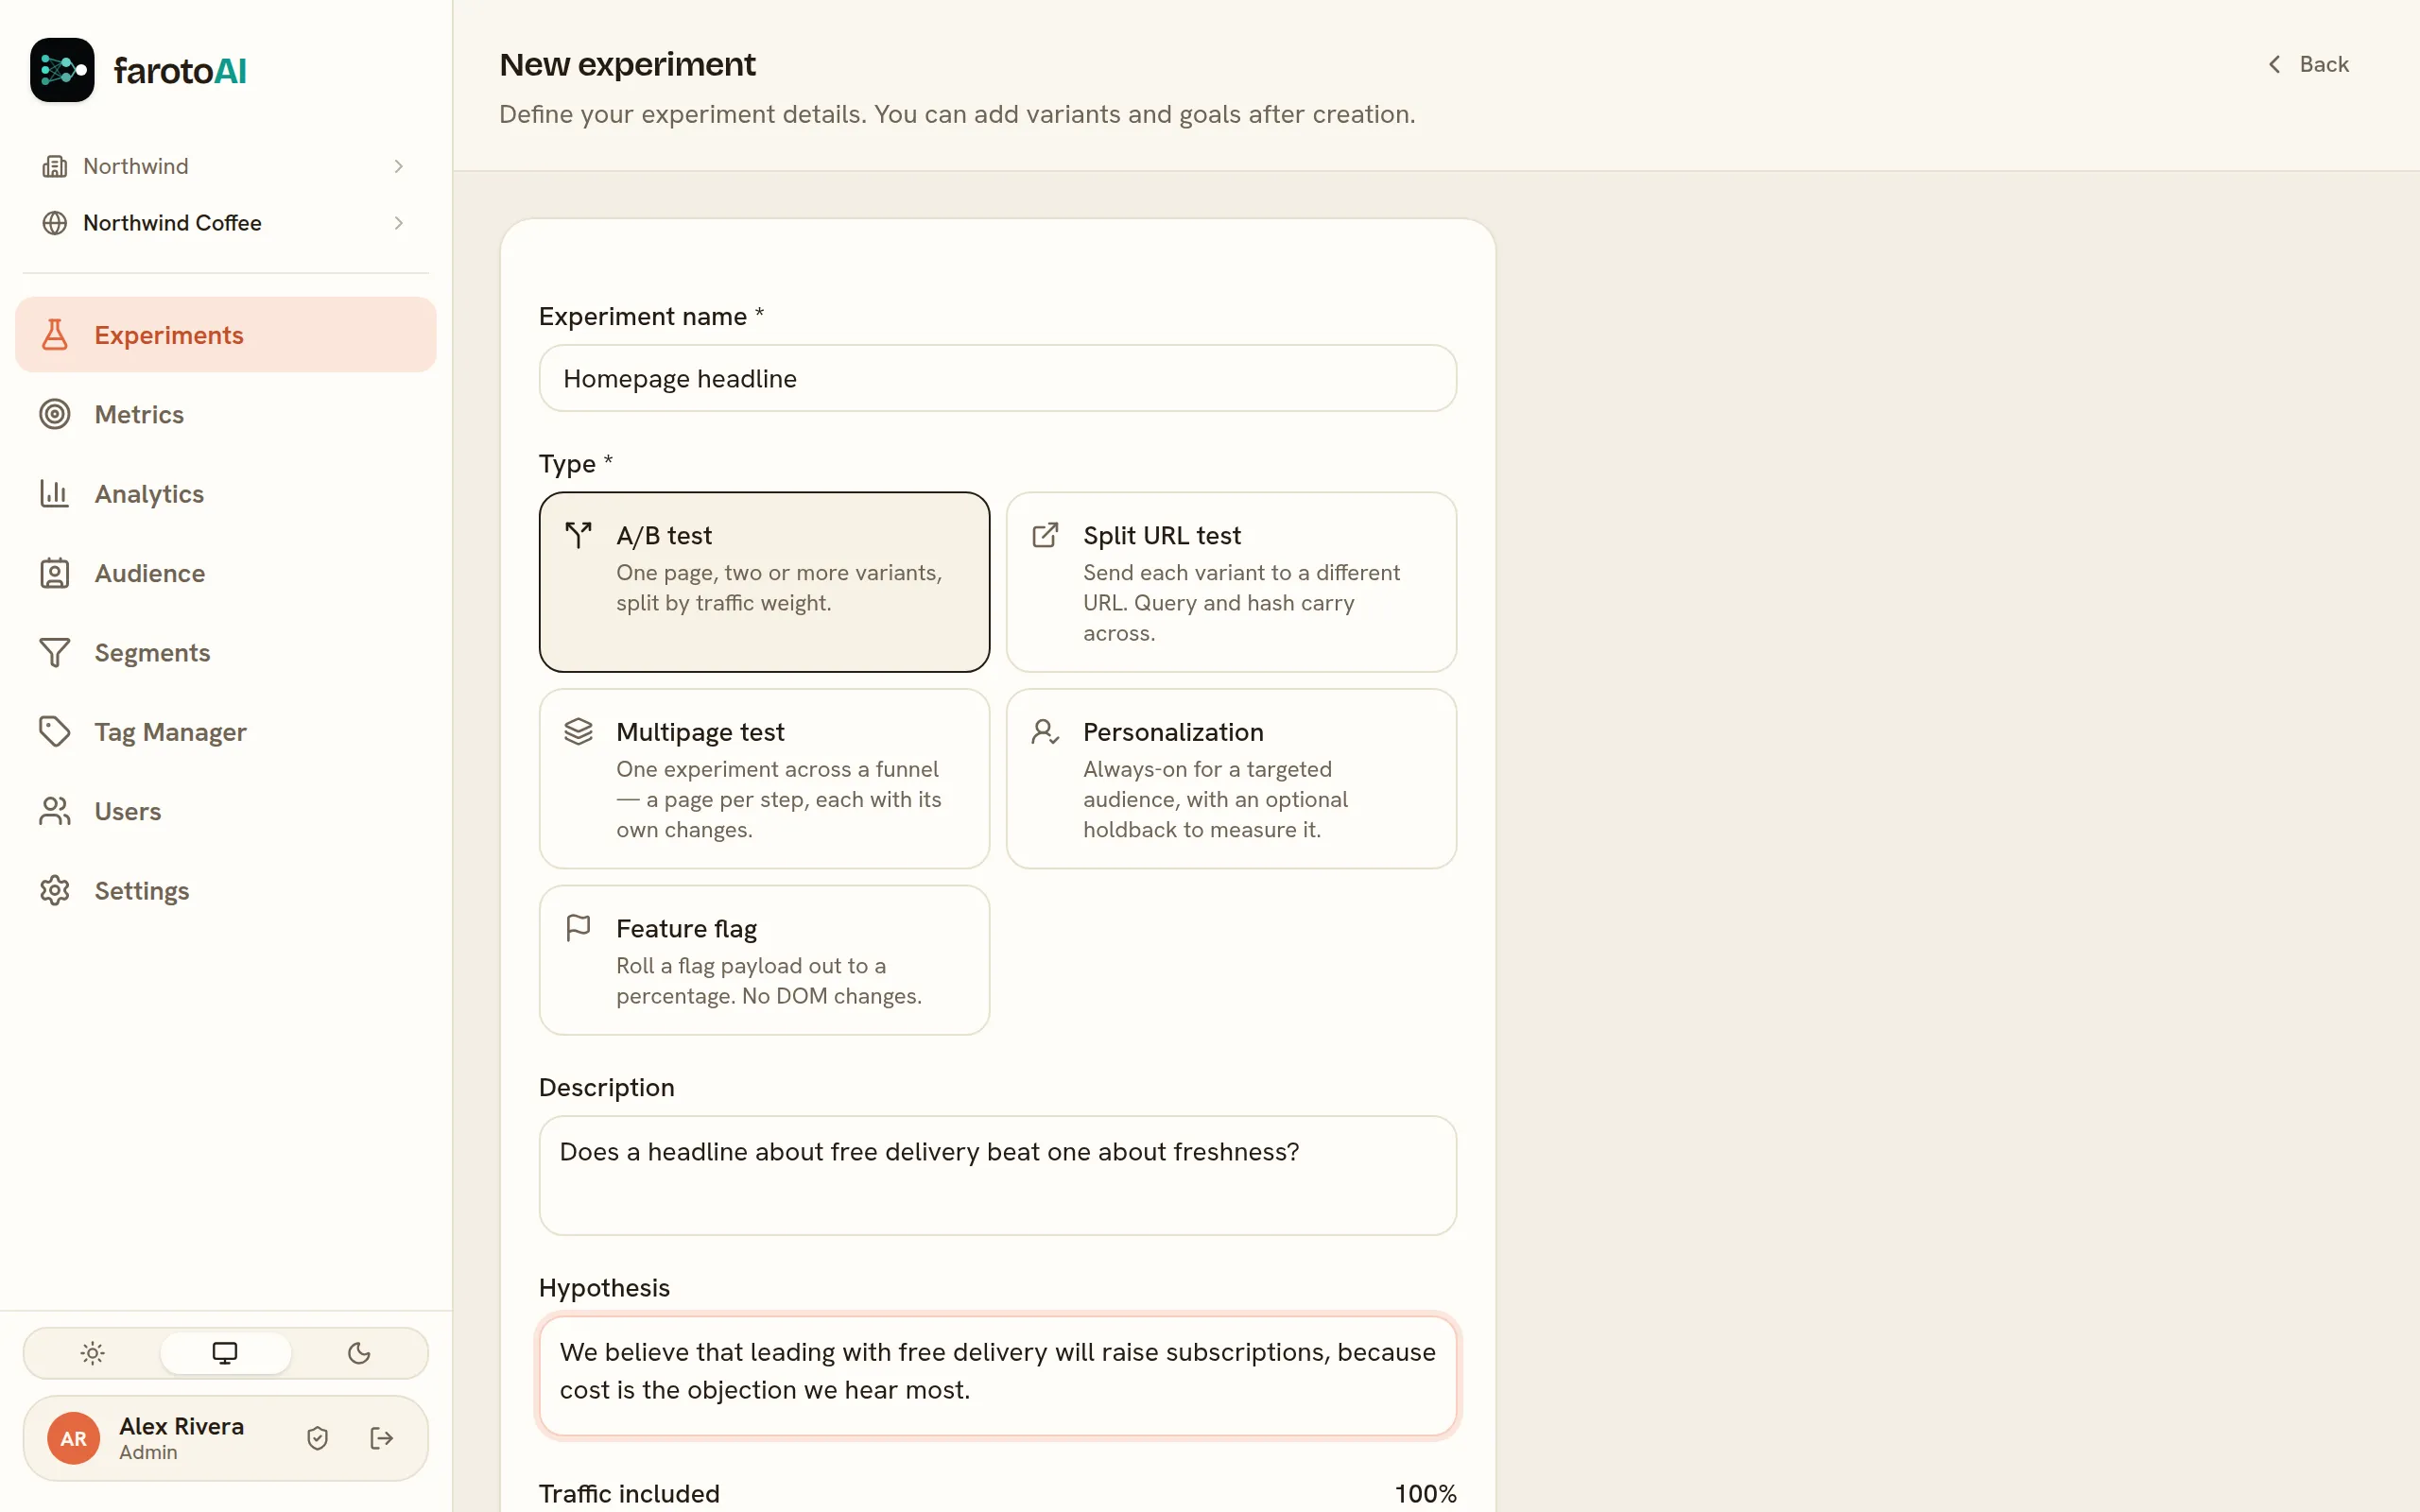
The experiment opens as a Draft. Nothing reaches your site until you start it.
2. Add the variants
Section titled “2. Add the variants”Every experiment needs a control — the page as it is — and at least one variant with a change.
-
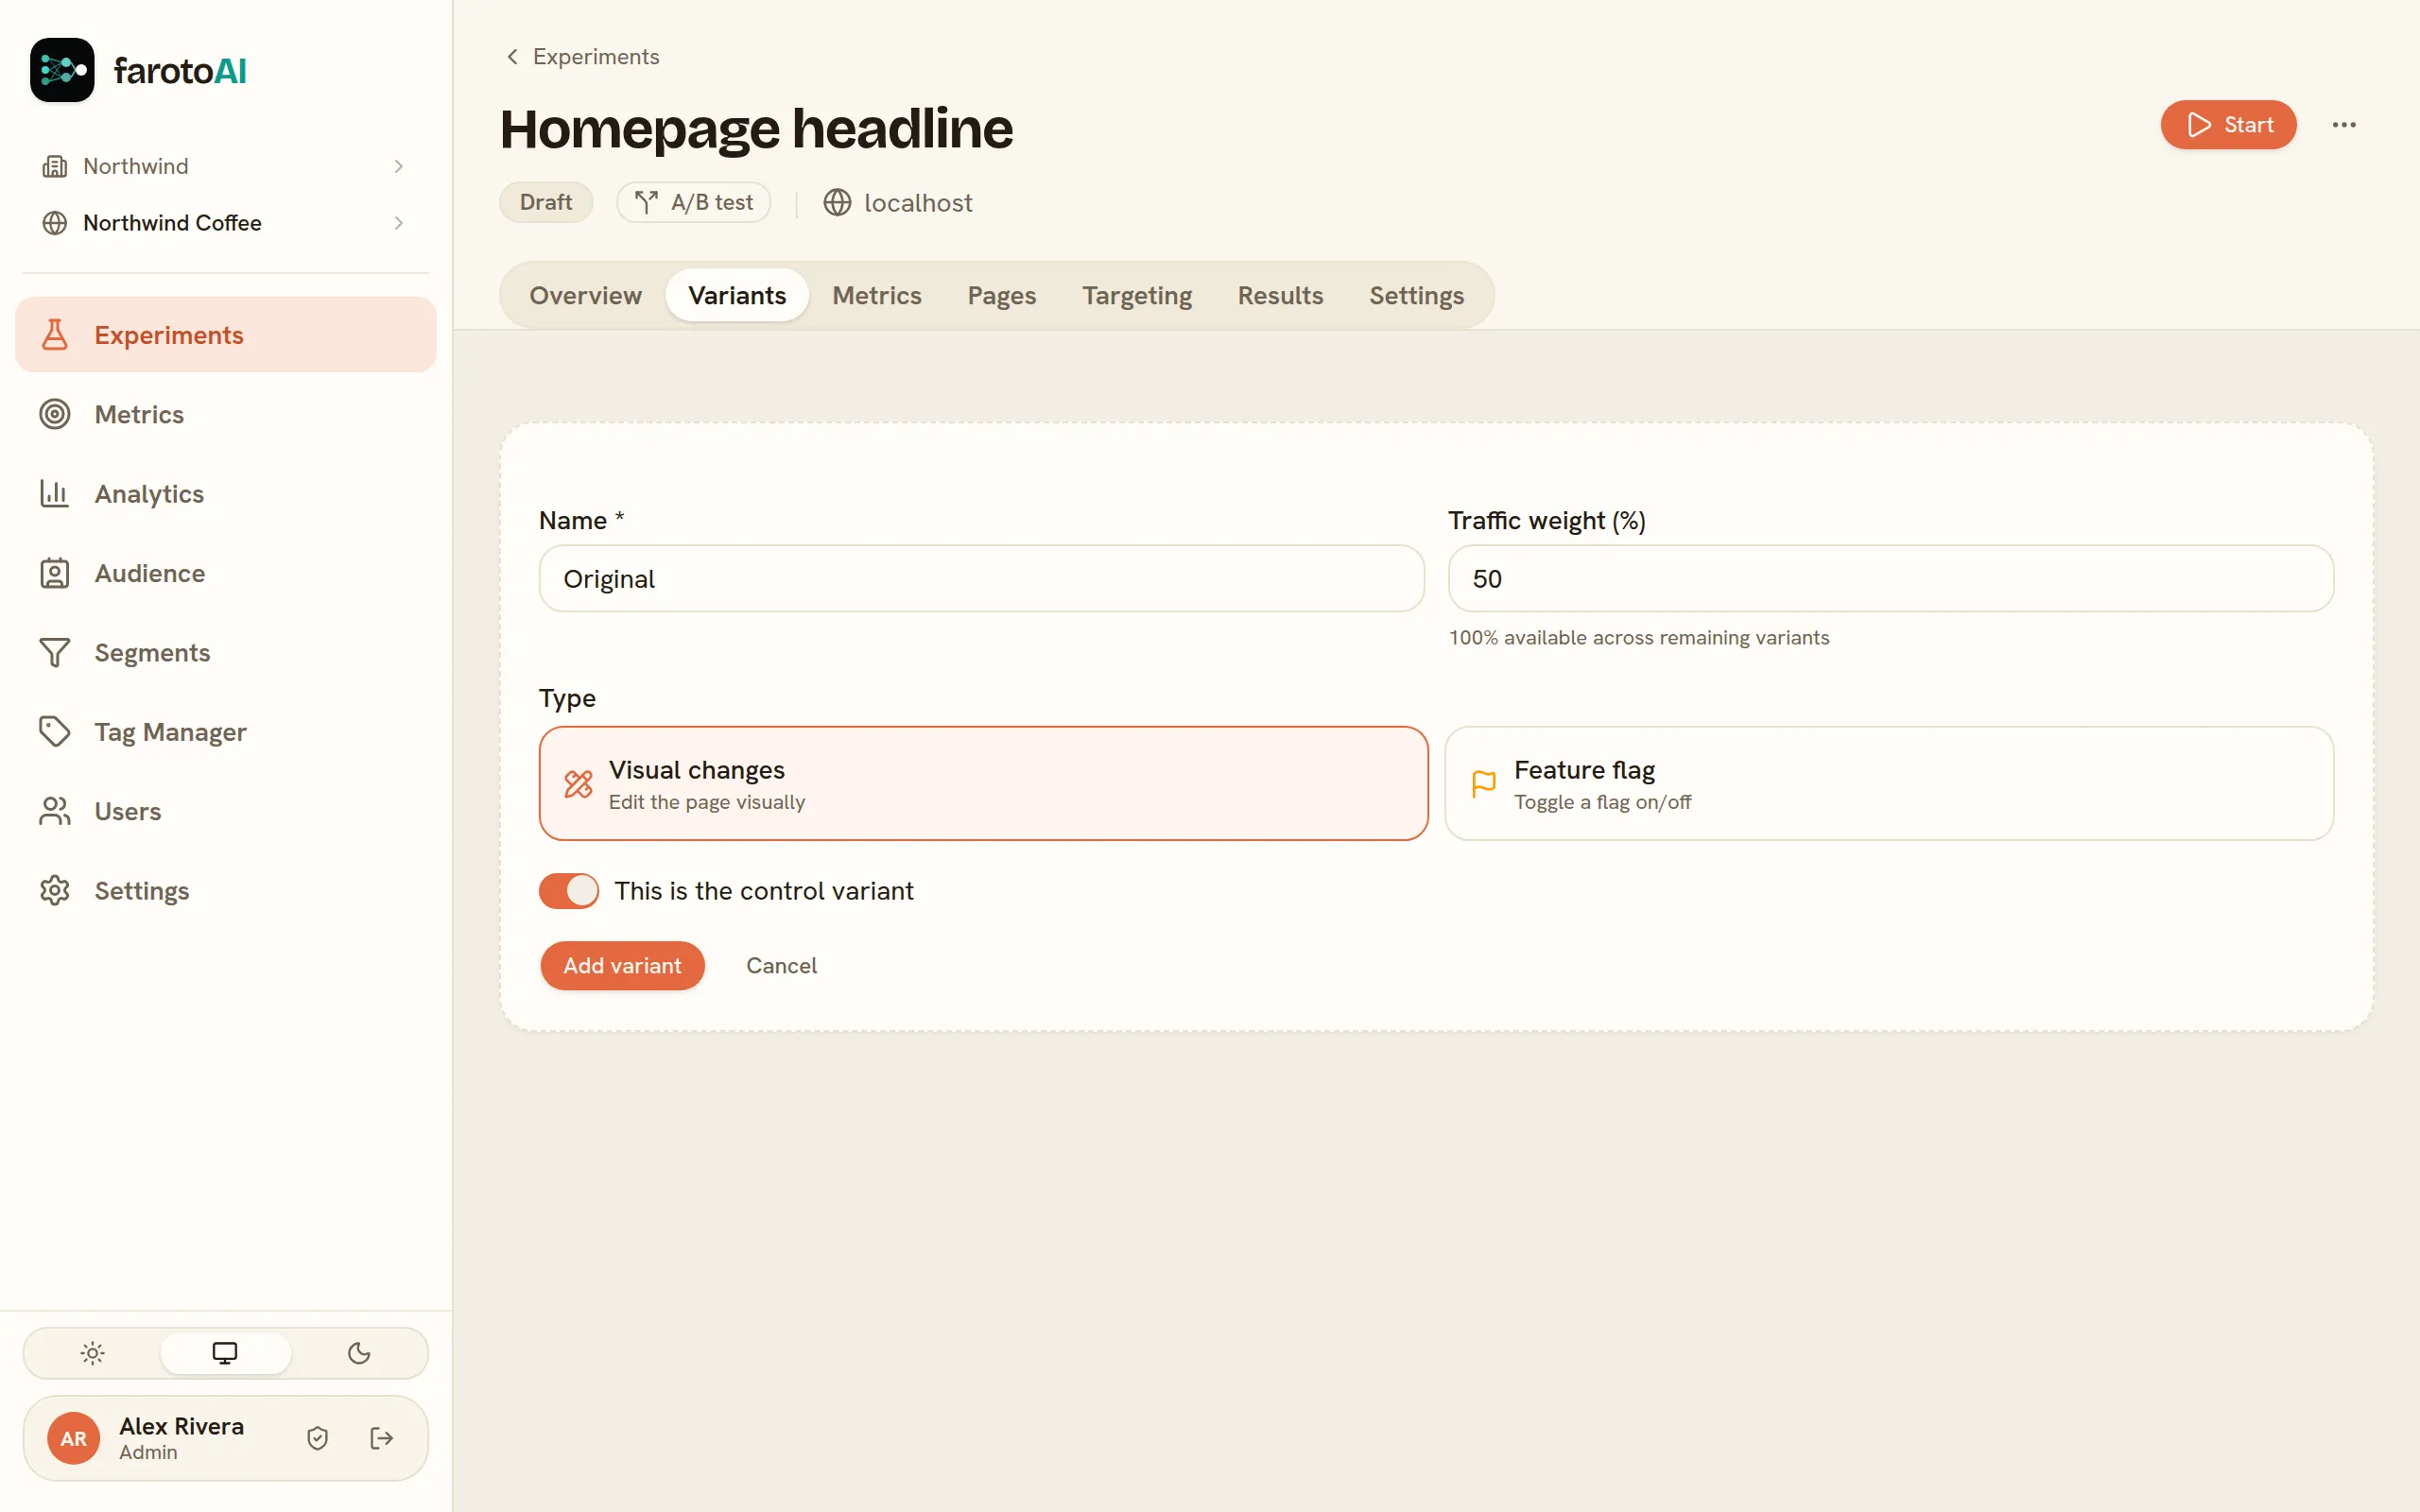
Open the Variants tab and select Add variant.
-
Name it Original and turn on the switch This is the control variant. Select Add variant.
-
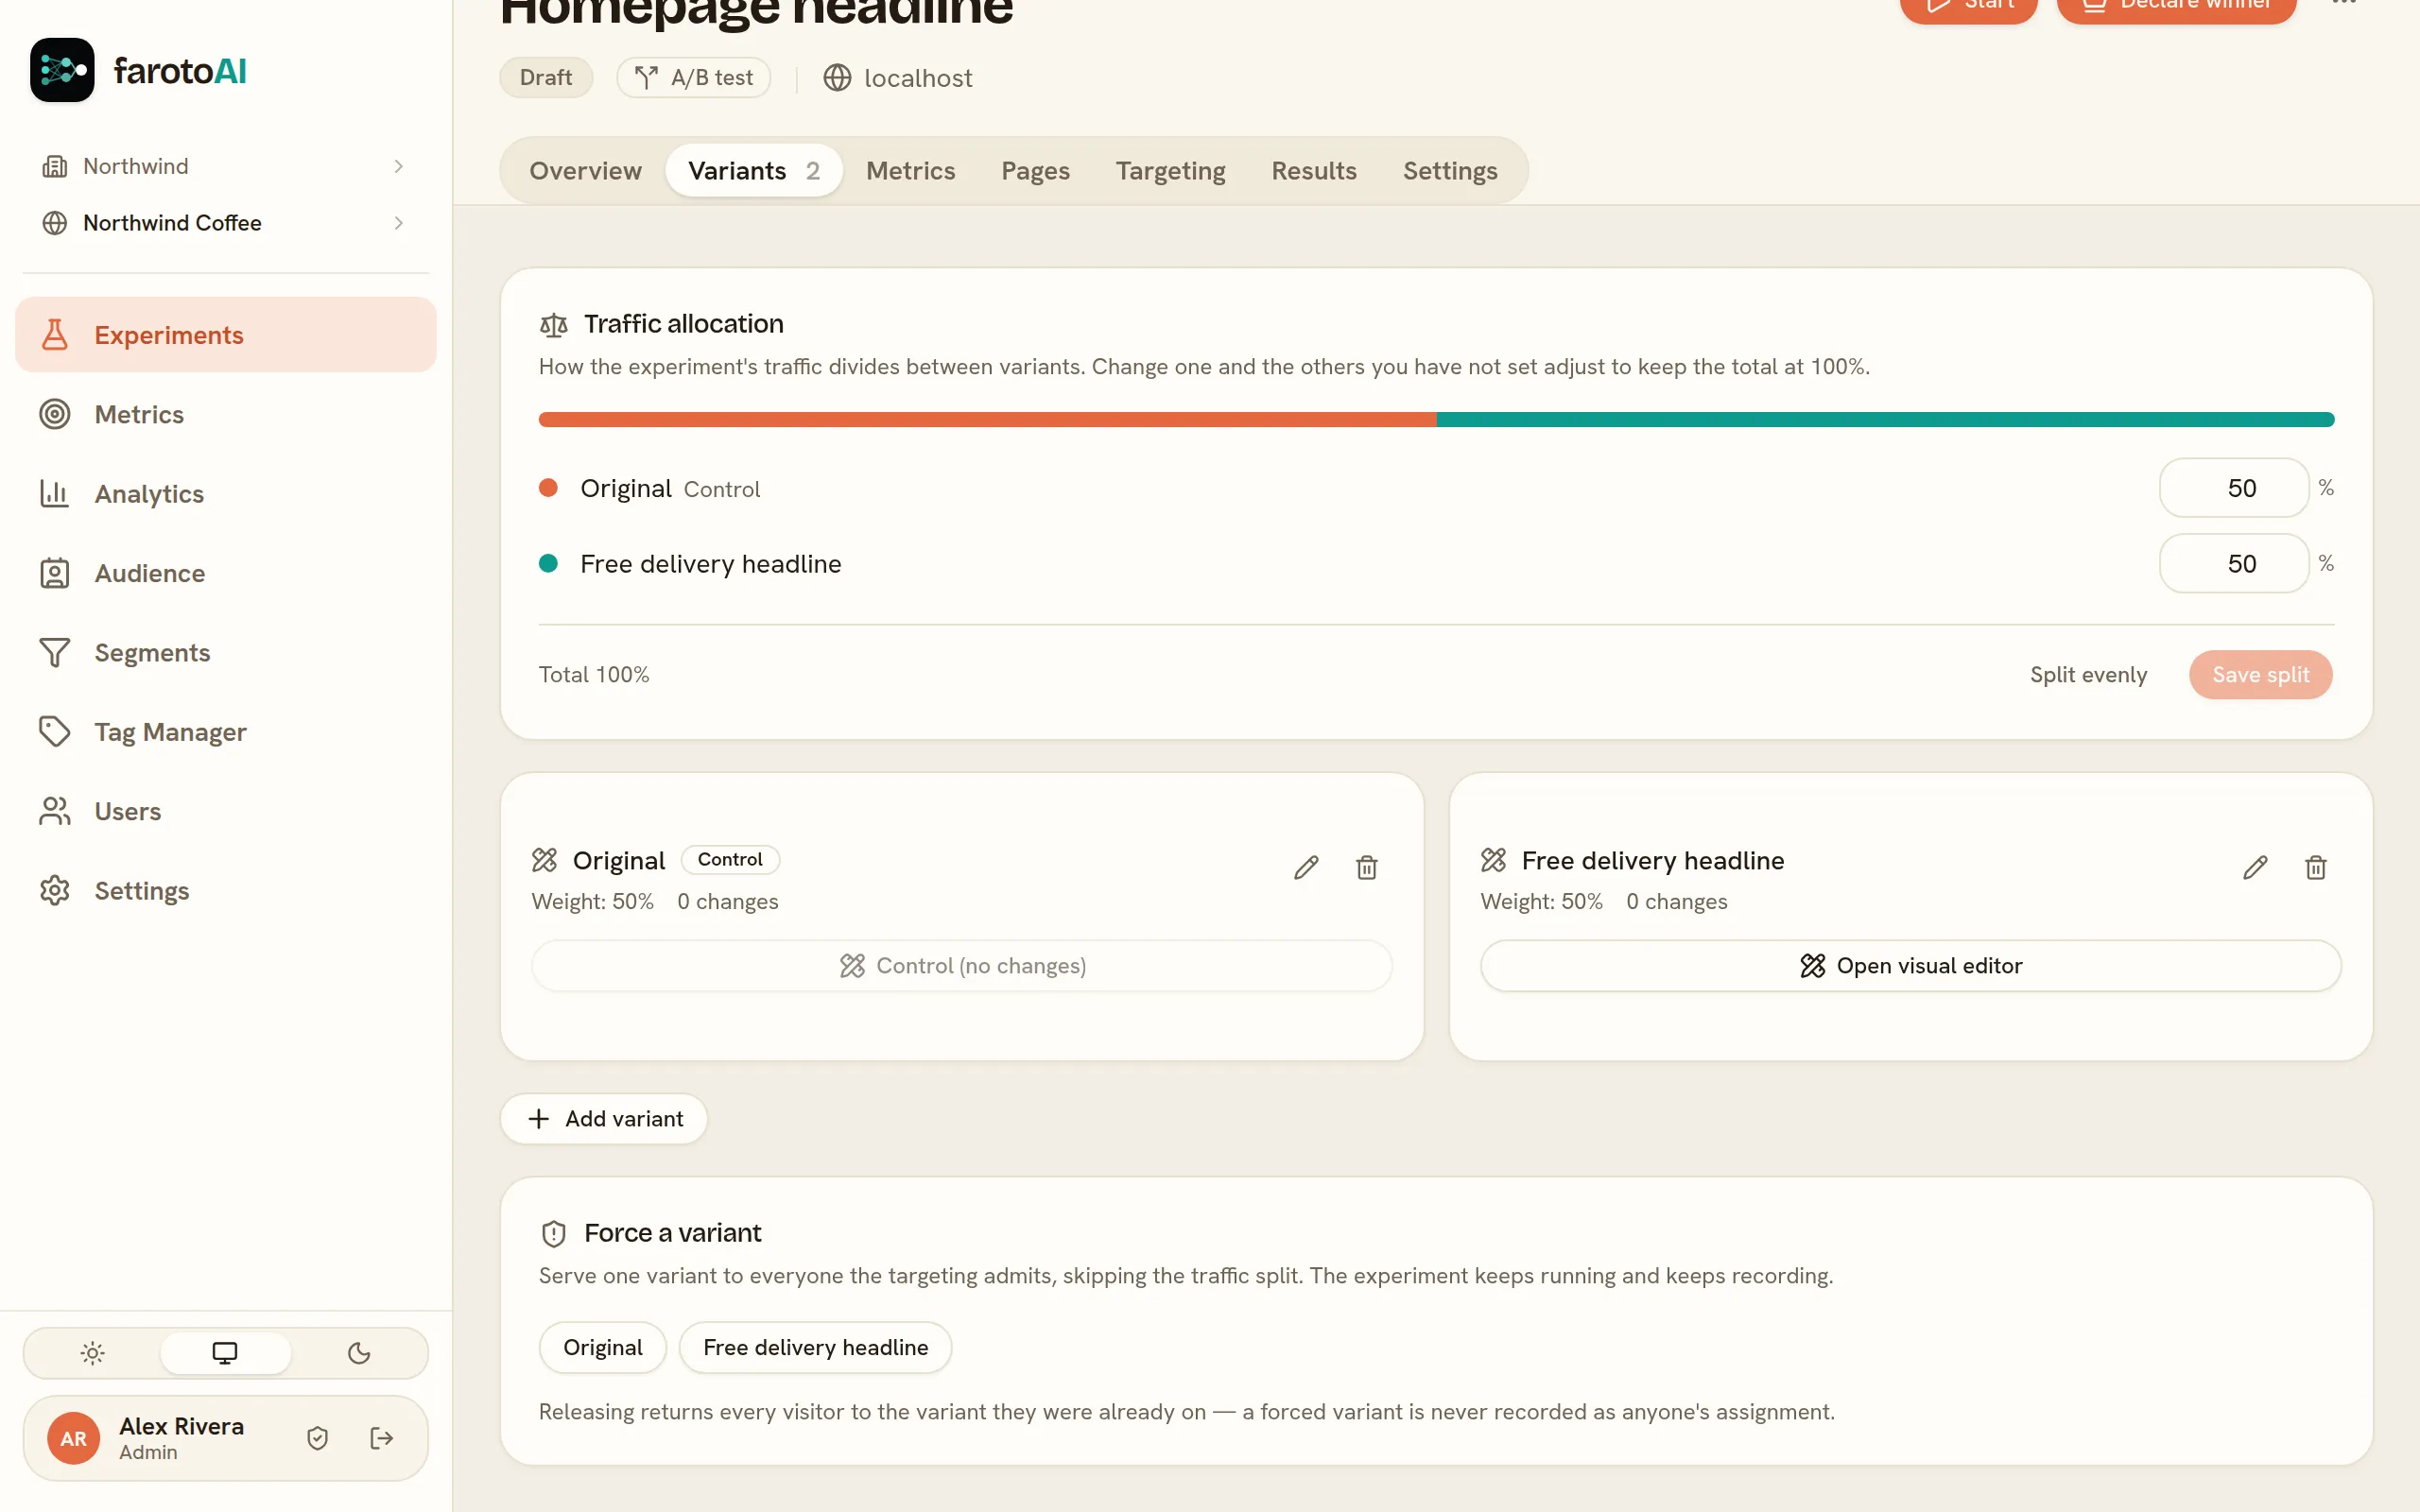
Select Add variant again, name it after the change — Free delivery headline — and add it with the switch off.
AB Tester splits traffic evenly. To change the split, edit the percentages under Traffic allocation and select Save split; the others adjust to keep the total at 100%.
3. Make the change in the visual editor
Section titled “3. Make the change in the visual editor”-
On the variant’s card, select Open visual editor.
-
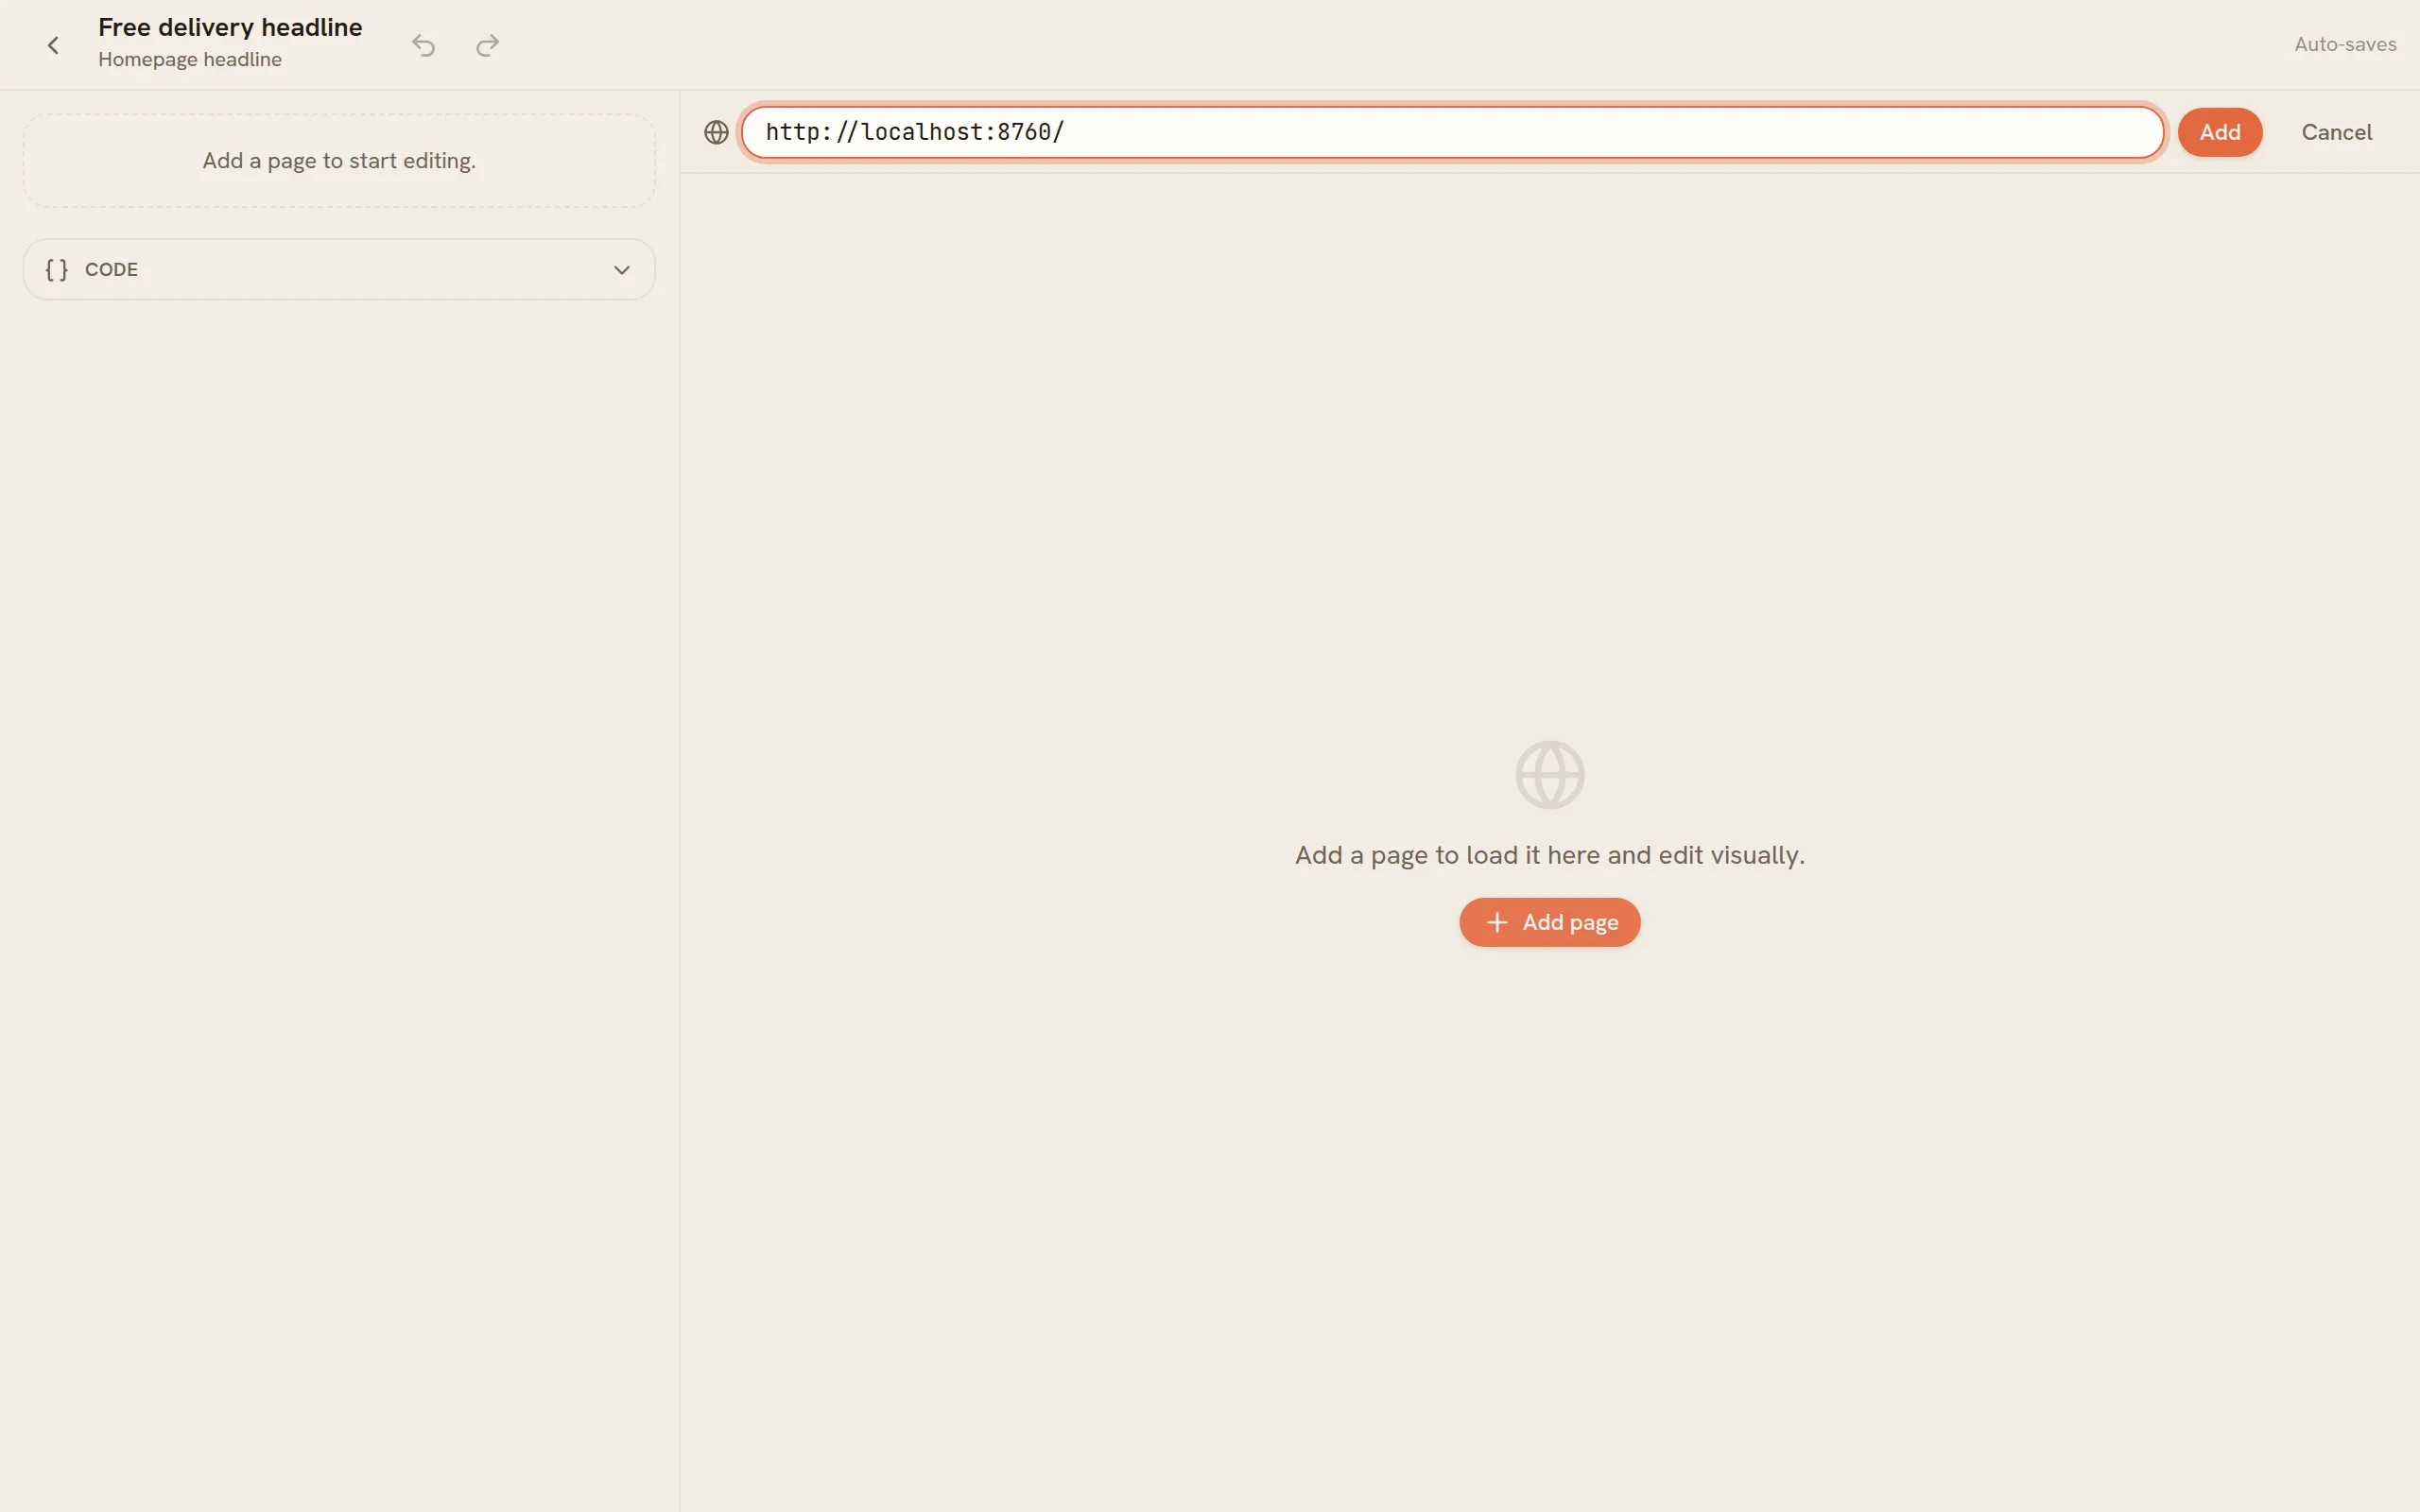
The editor needs to know which page to load. Select Add page, enter the page’s full address and select Add. The page appears on the right, as your visitors see it. The editor keeps the pages you add in a list above the page, so you can switch between them; the × beside the list takes the page on screen off it.
-
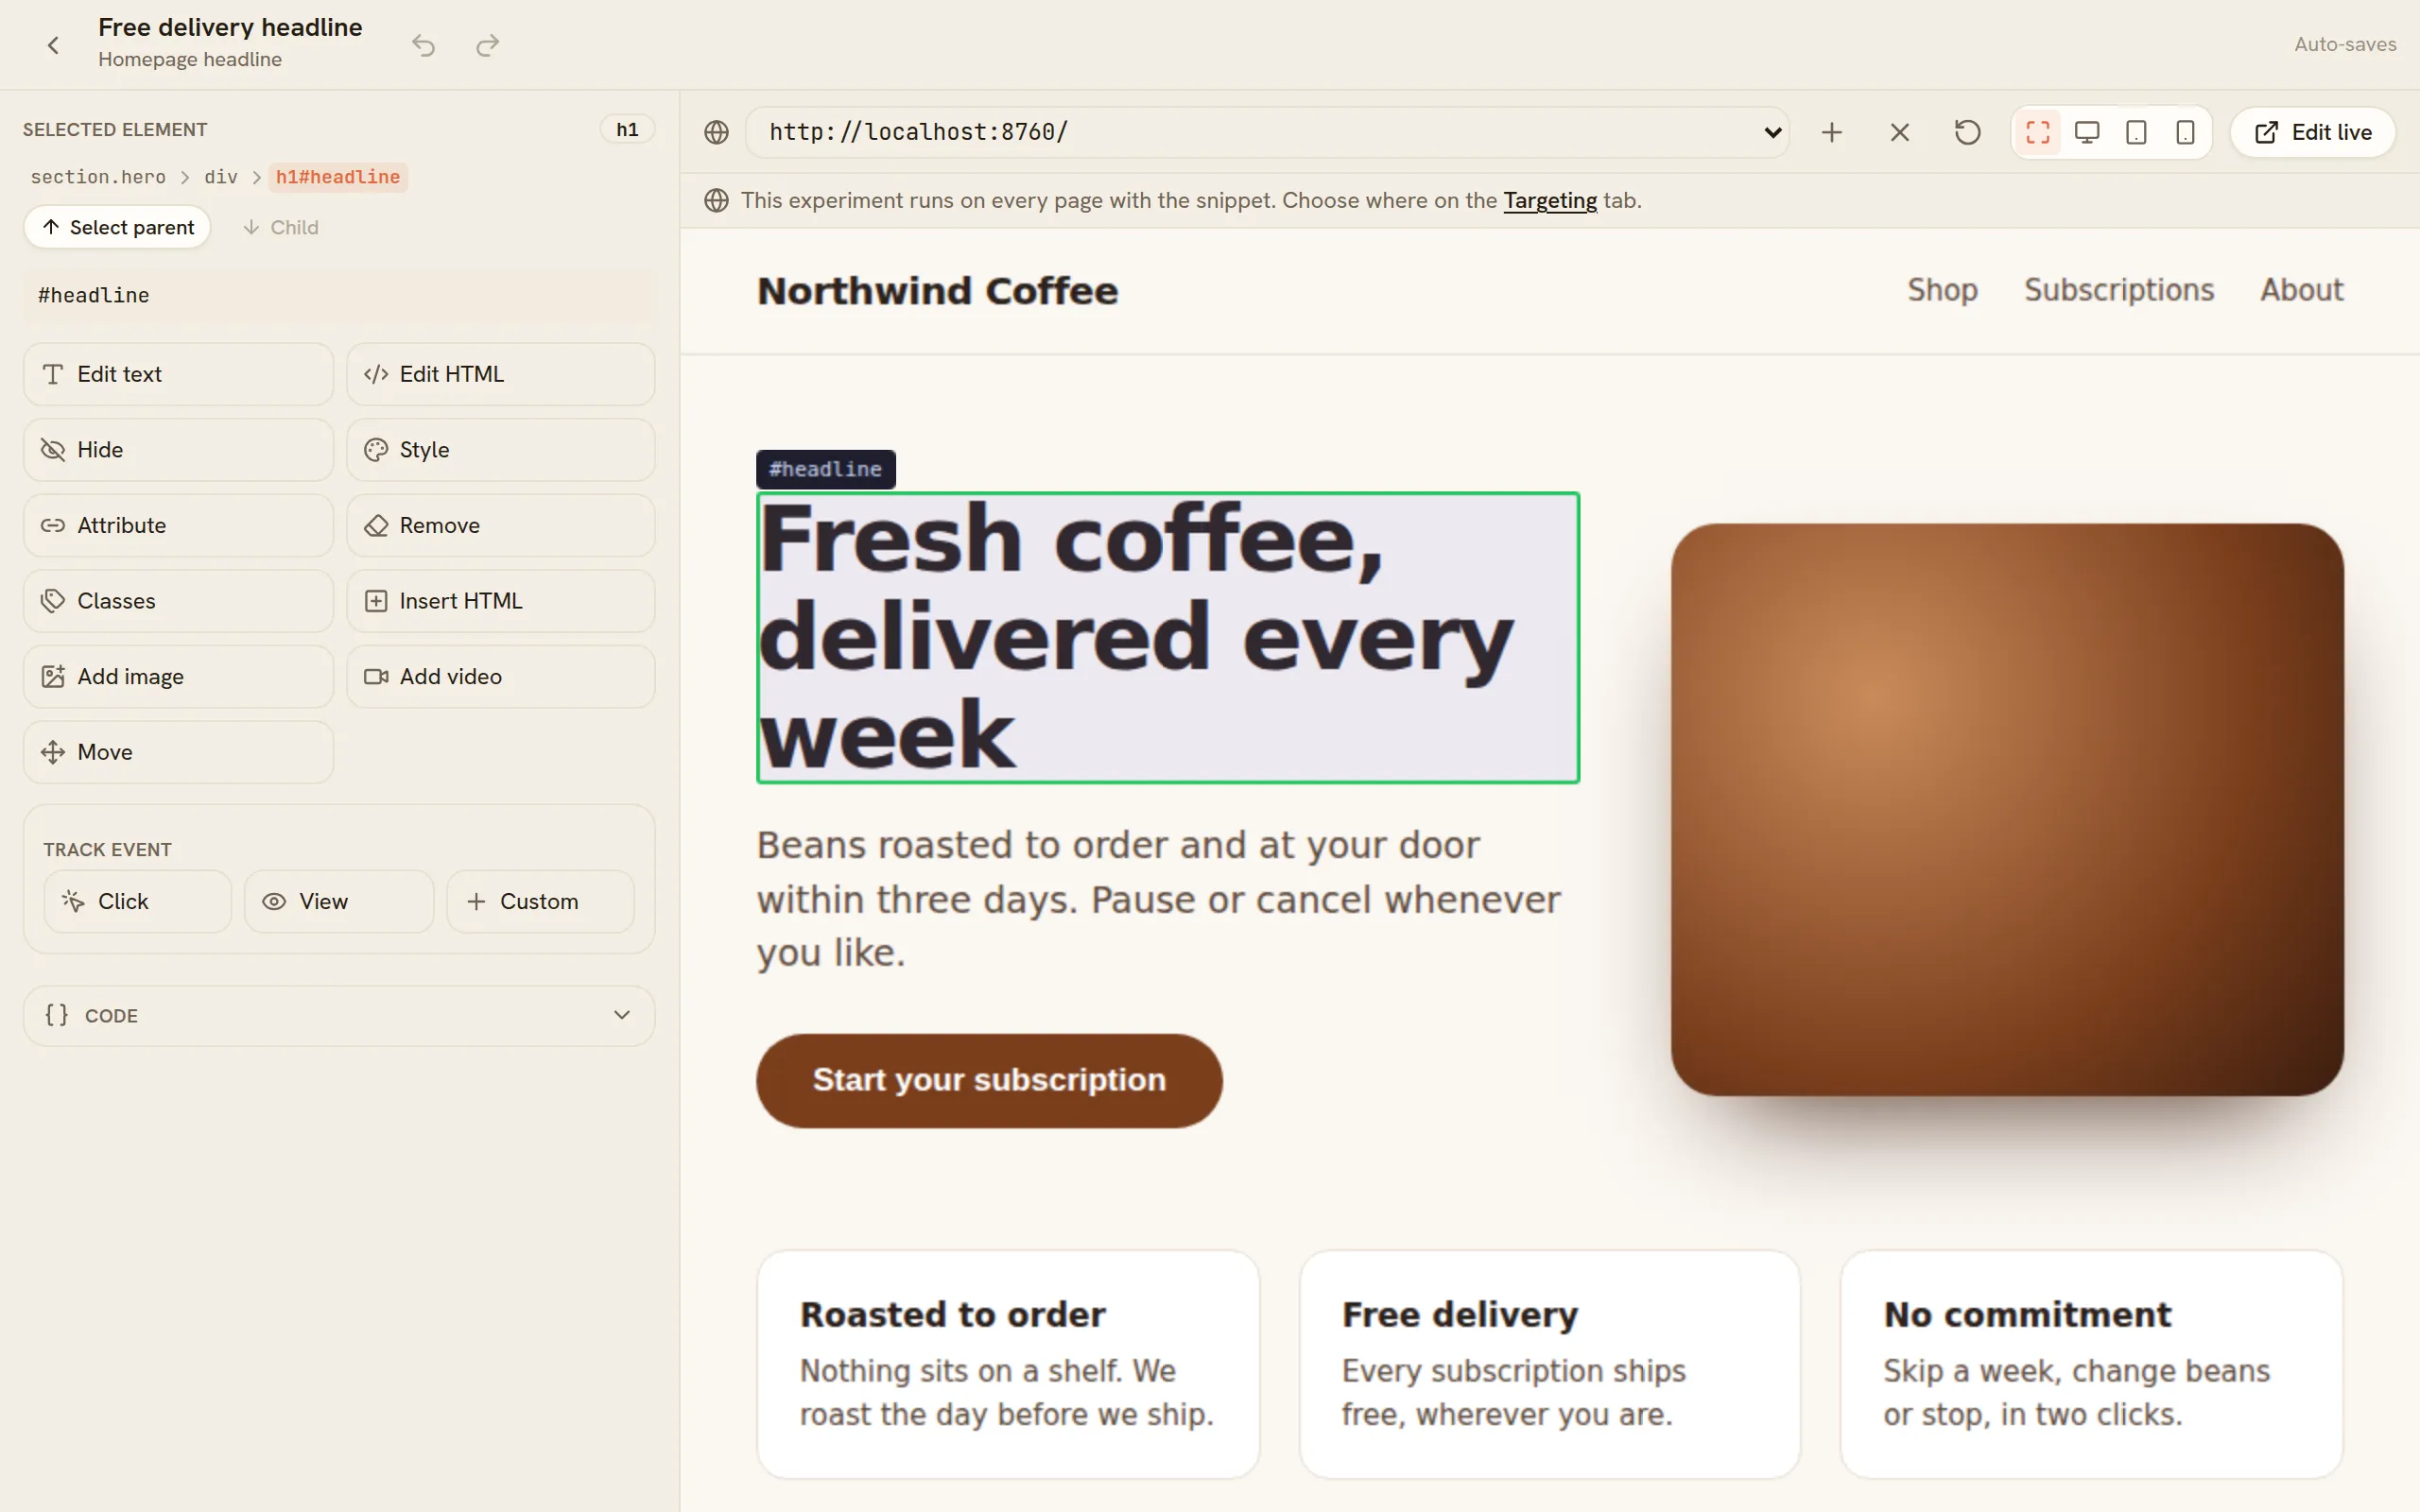
Select the element you want to change — here, the headline. The left panel shows what you selected and what you can do to it. Select parent moves the selection to the element around it.
-
Select Edit text and type the new headline. The page updates as you type, and the change is listed under Changes. 1 match means the change will apply to exactly one element on the page.
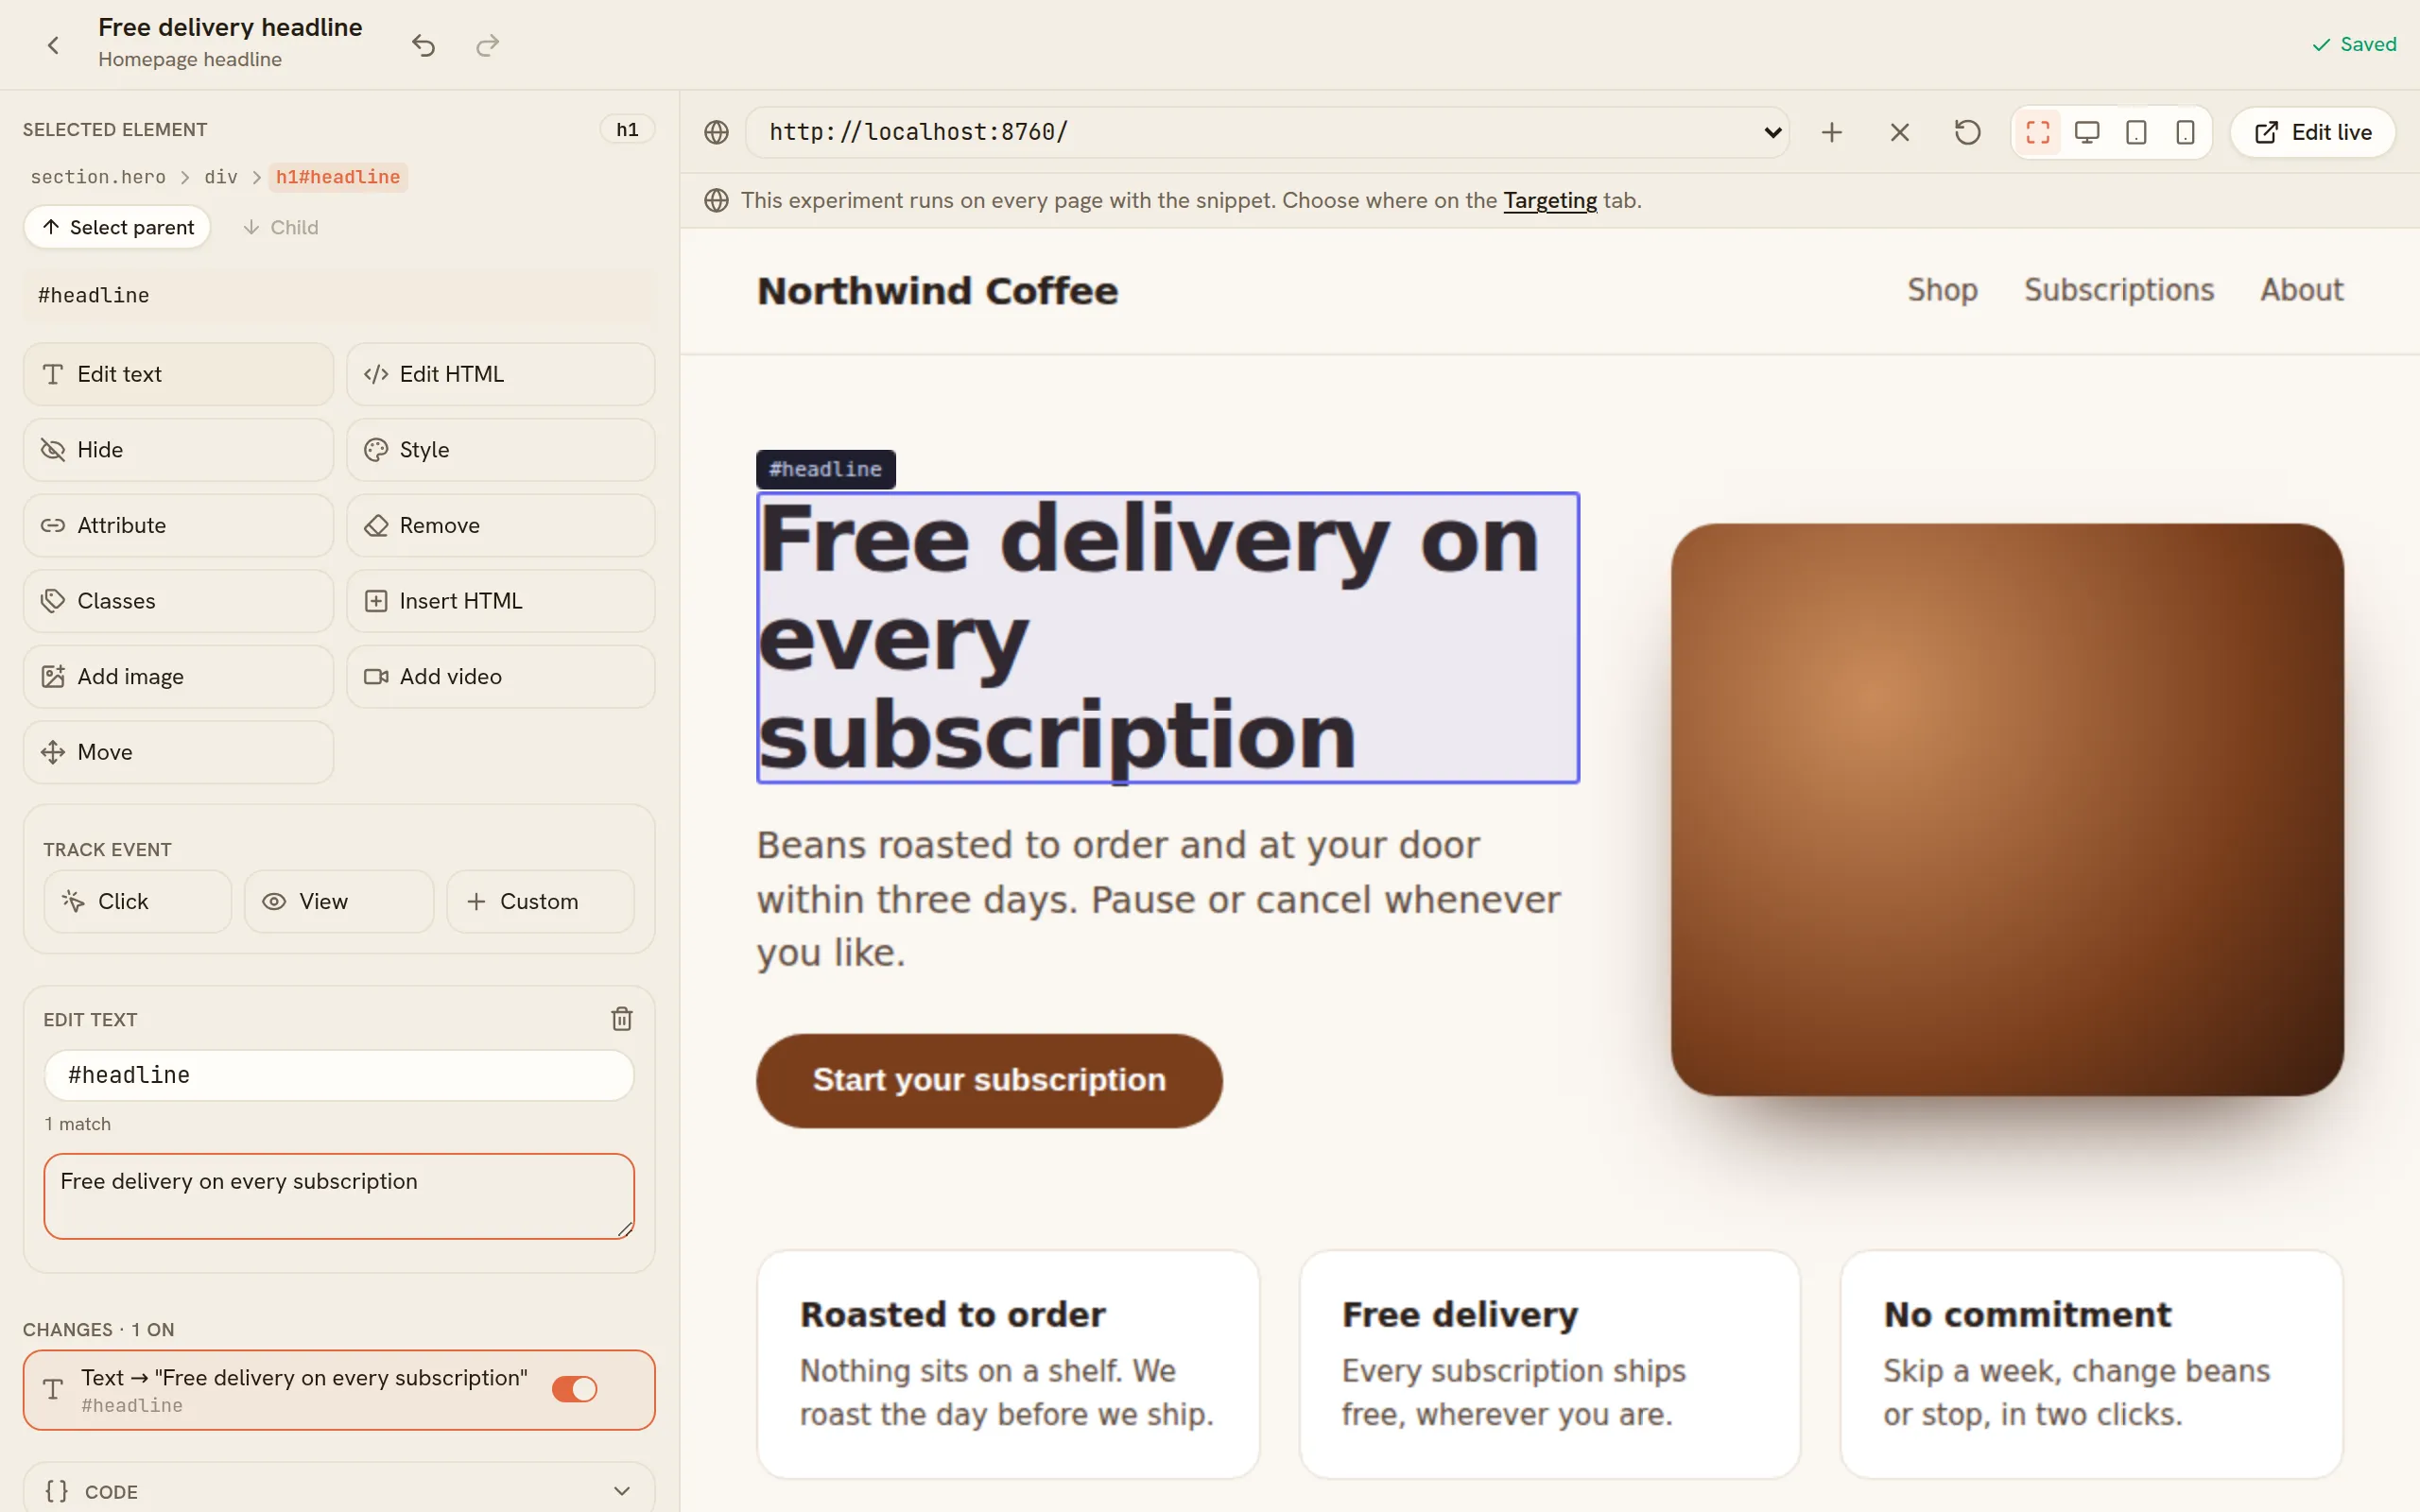
Changes save automatically; the top right says Saved. Undo and redo are beside the variant’s name. The control needs no changes: it is the page as it is.
4. Choose what counts as a conversion
Section titled “4. Choose what counts as a conversion”A metric is what you want more of. The quickest way to make one is from the editor, on the element itself.
-
Still in the editor, select the button visitors should click — here, Start your subscription.
-
Under Track event, select Click, give the metric a name such as Subscribe click, and select Create.
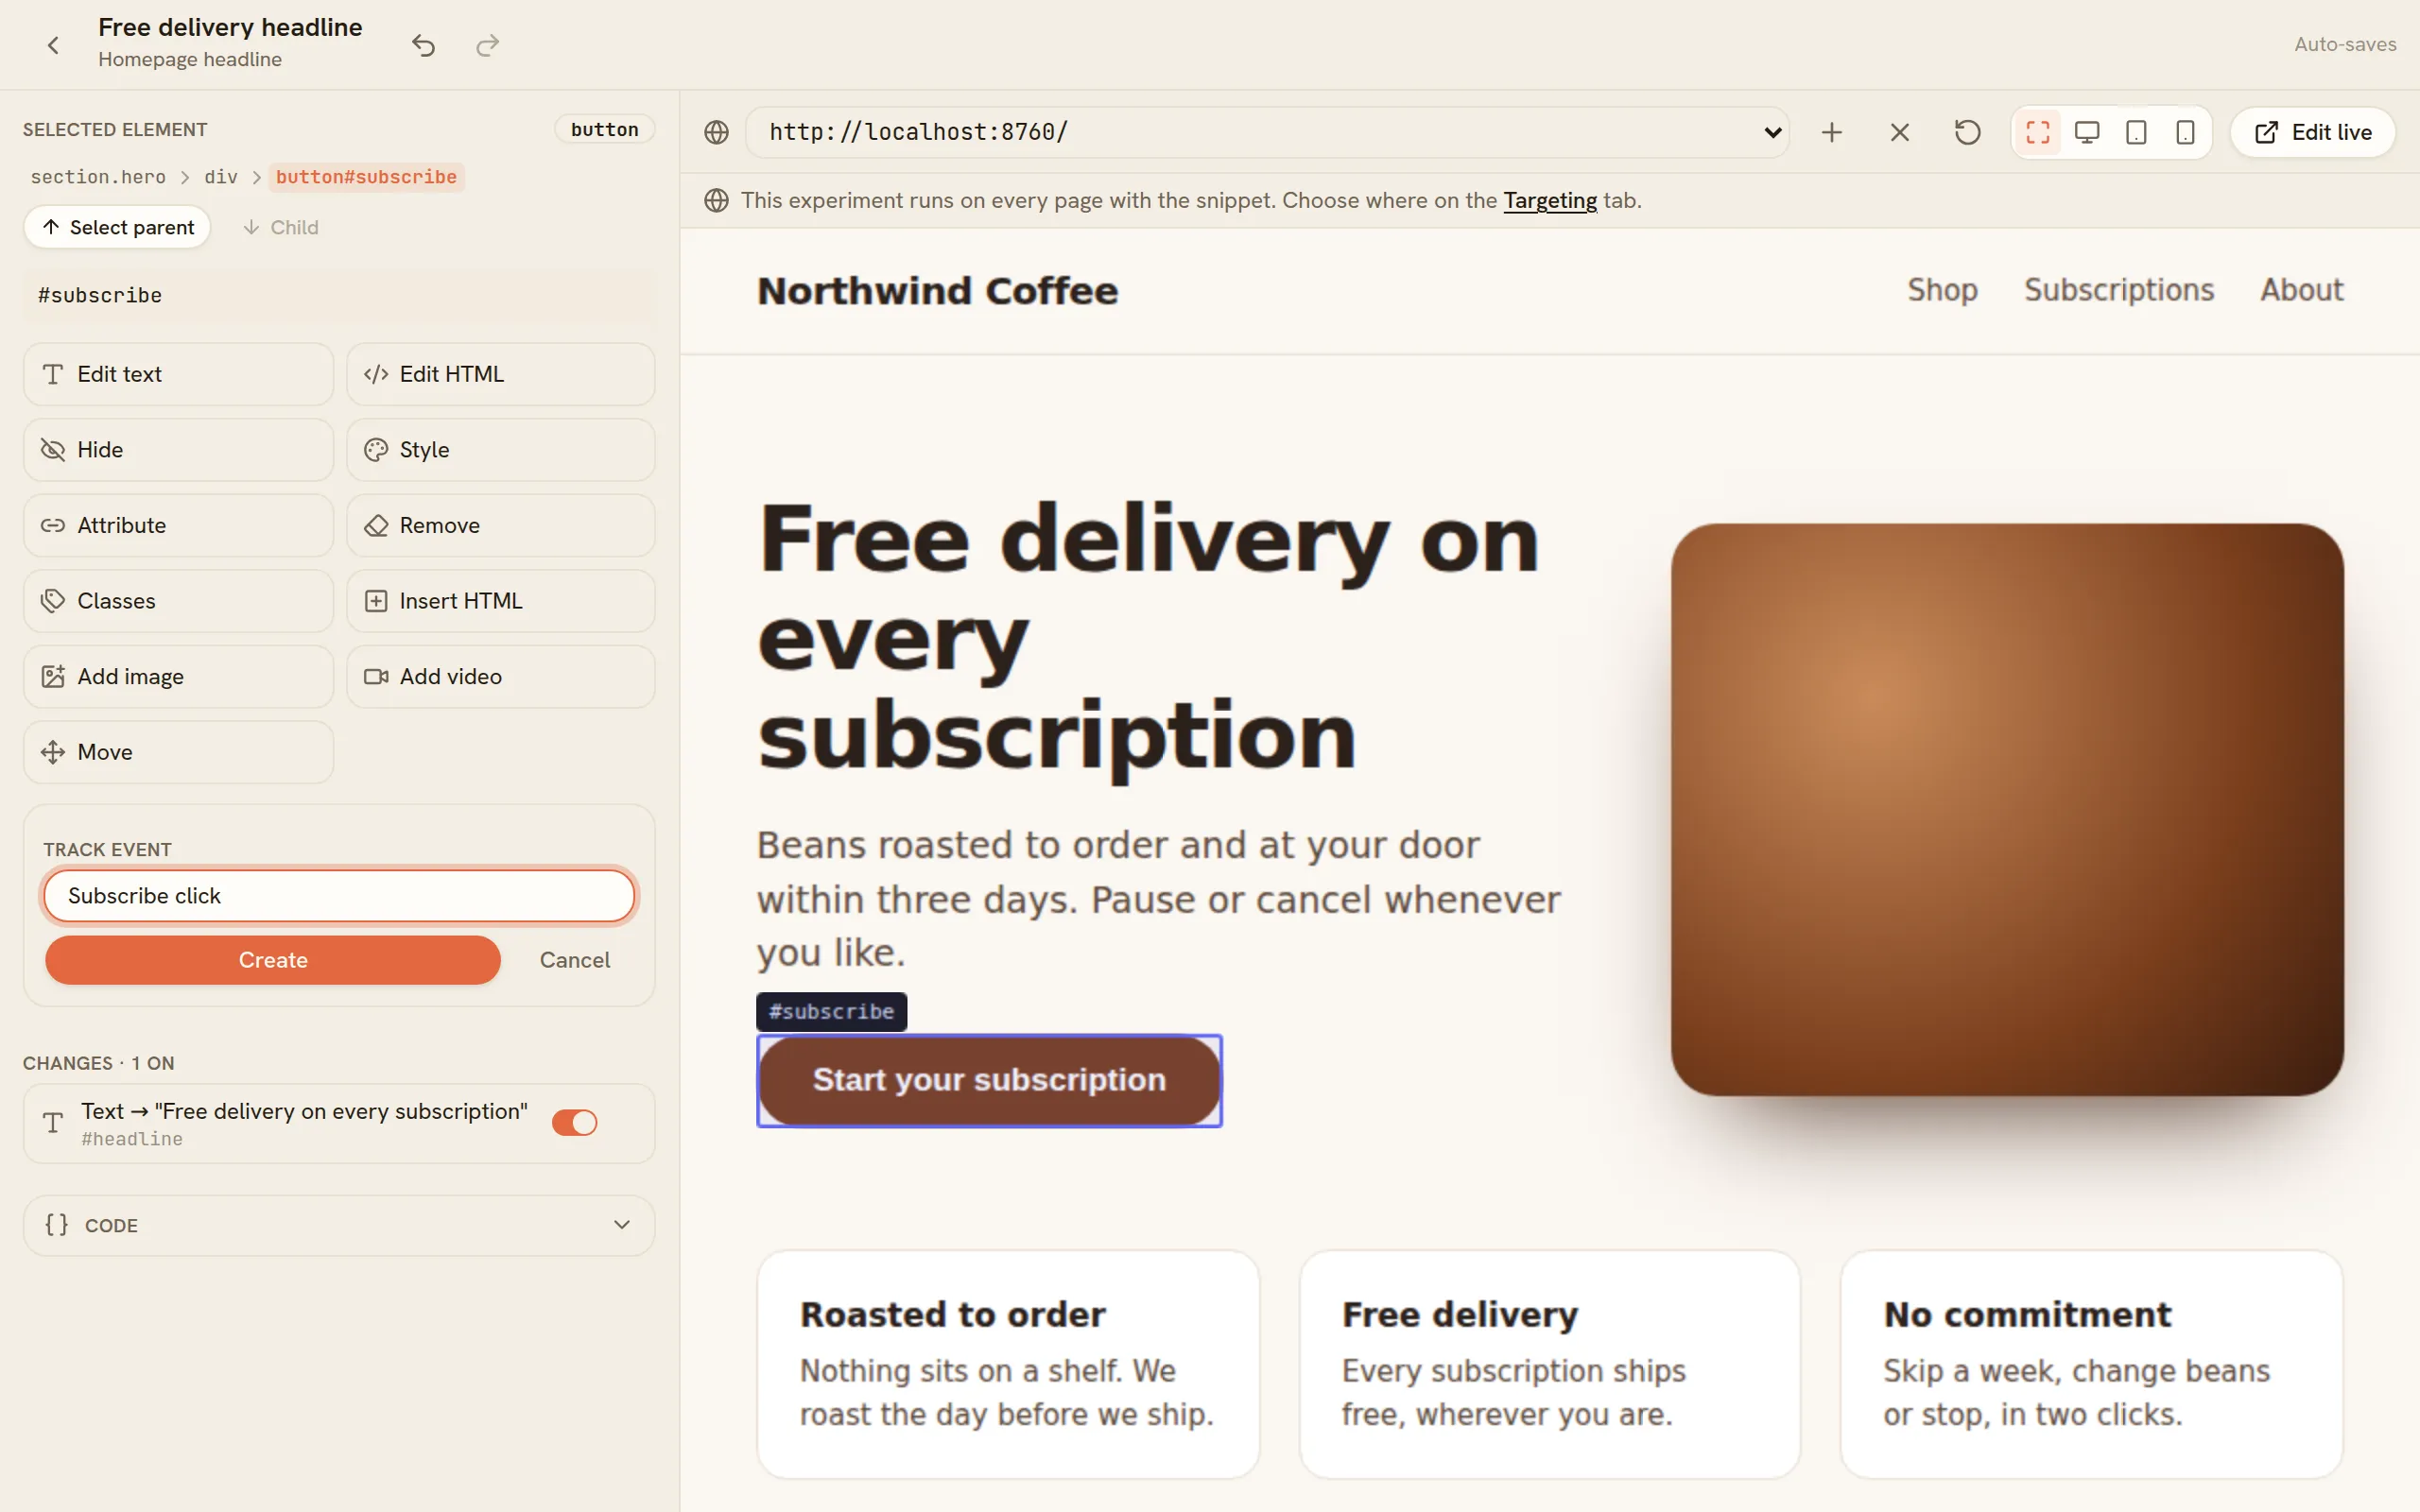
The metric is attached to the experiment and, as the first one, becomes its primary metric: the one that decides the result. You can see it, and add others, on the experiment’s Metrics tab.
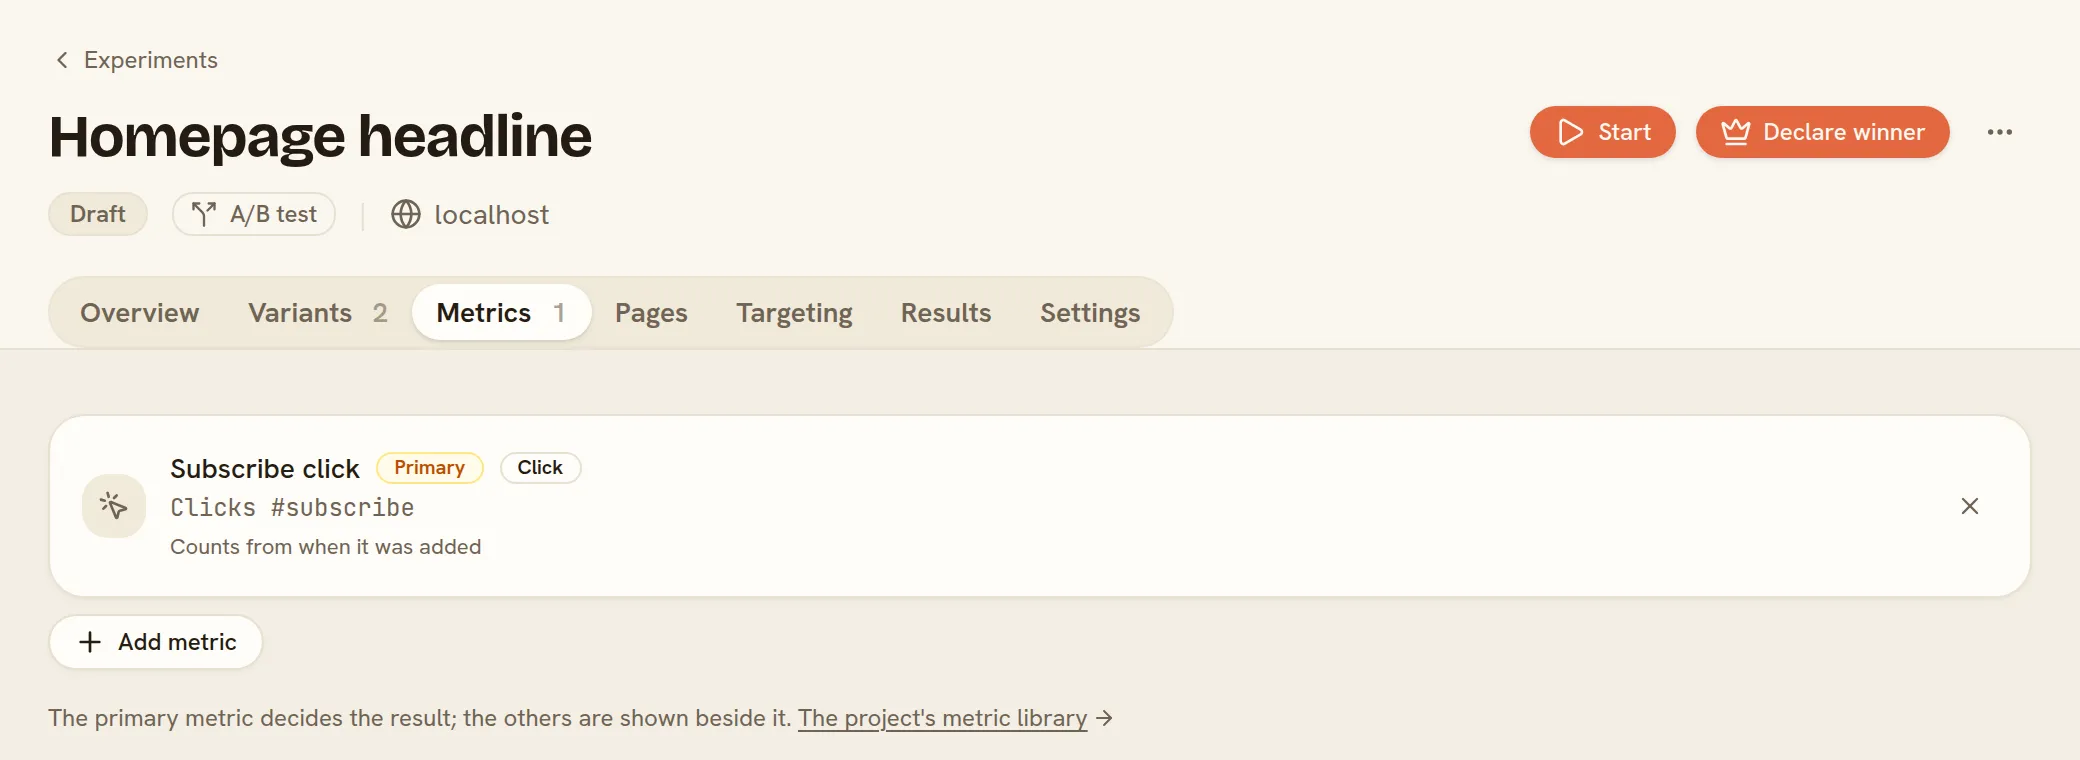
Metrics also cover pages reached, purchases and their amounts, scroll depth and your own tracked events. Select Add metric on the Metrics tab to choose from them.
5. Decide where it runs
Section titled “5. Decide where it runs”-
Open the Targeting tab and select Add condition.
-
Choose Page URL, then is, then path, and type the page’s path —
/for the homepage. -
Check the result under Test a URL: enter an address from your site and AB Tester says whether the experiment would run there.
-
Select Save targeting.
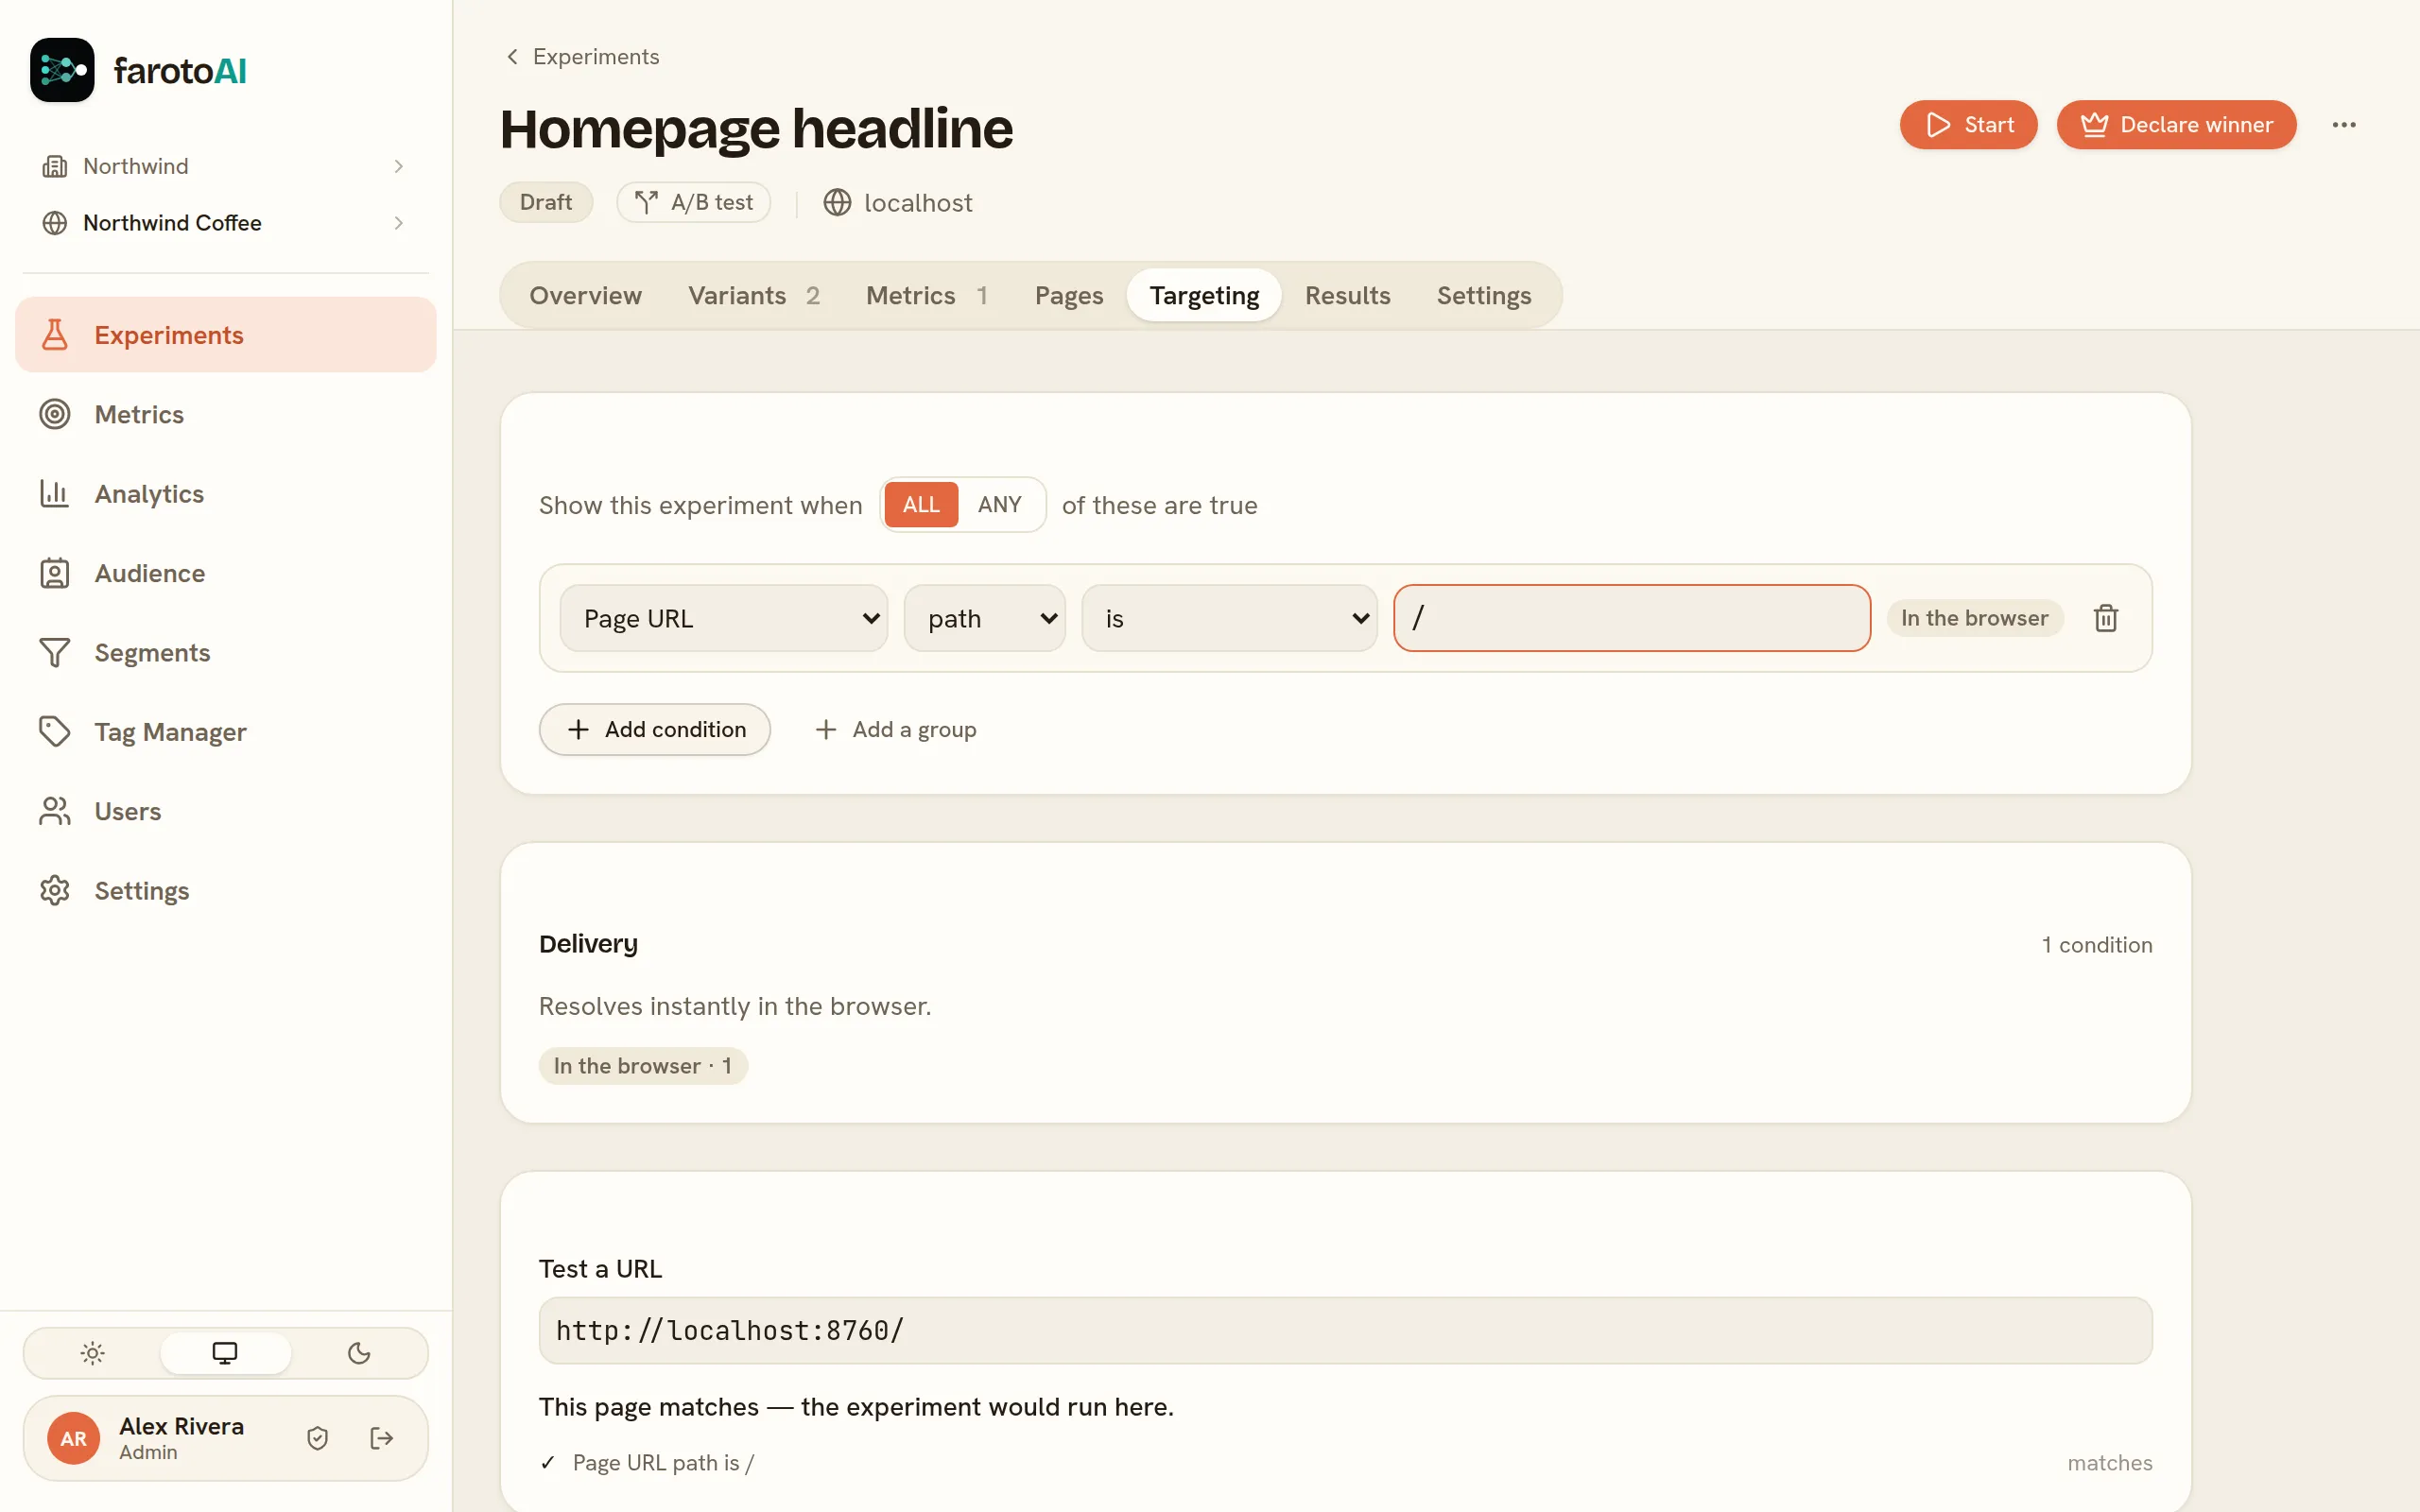
A path condition ignores anything after a ?, so visitors who arrive from a campaign link such as
/?utm_source=newsletter are still included. To run on a group of pages, choose matches pattern and use *:
/products/* covers every product page.
Add more conditions to narrow the audience — device, browser, language, campaign, new or returning visitors, and more. With ALL selected, a visitor must meet every condition; with ANY, one is enough.
The Targeting tab is the only place that decides who sees the experiment. Back in the visual editor, the line under the page list now says whether the page on screen is one the experiment runs on, and warns you when it is not:
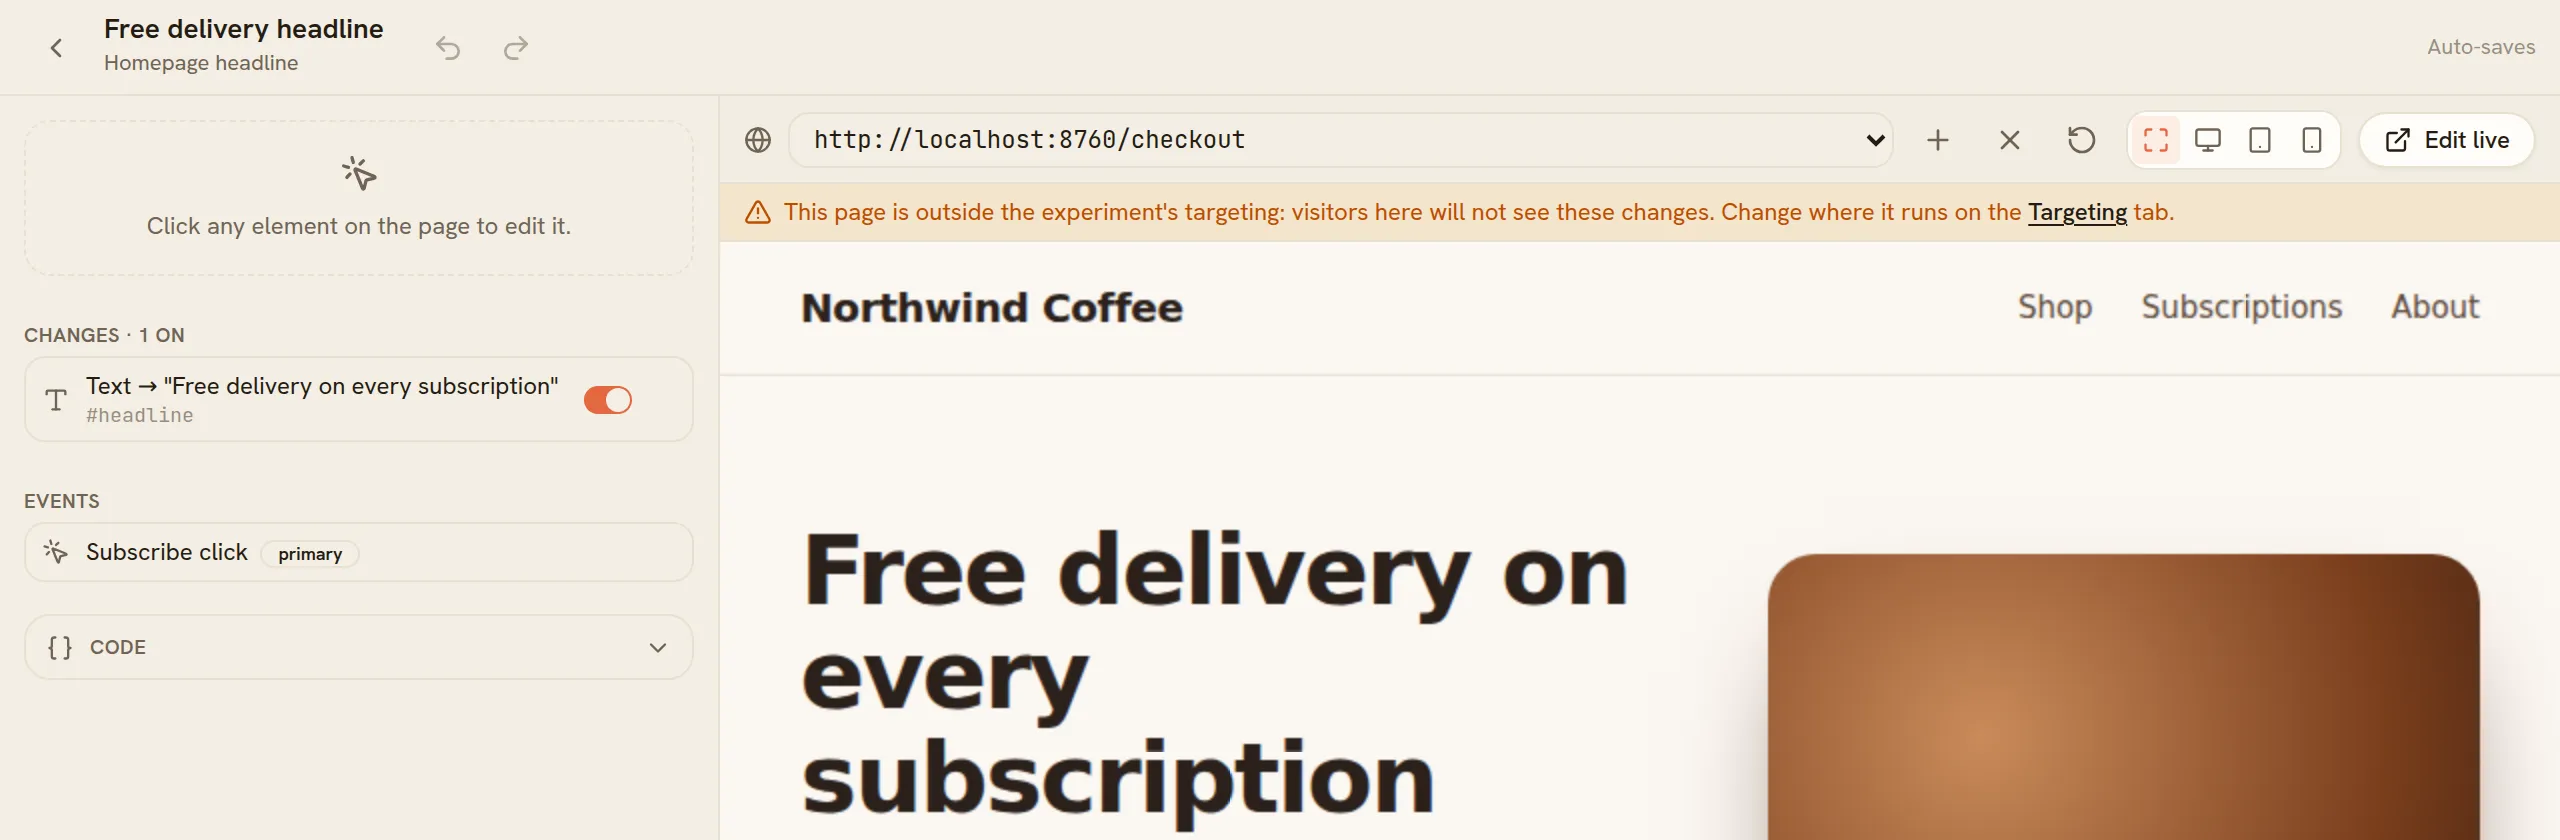
6. Start it
Section titled “6. Start it”Select Start at the top of the experiment. Its status changes to Running, and visitors get it from their next page load.

To see it on your site, open the page in a private browser window. Each private window is a new visitor, placed in a variant at random, so with a 50/50 split you will need a few windows to see both. Keep these checks few: your own visits count in the results like anyone else’s.
A running experiment can be paused with Pause. Visitors then see your page as it is, and the results so far are kept.